Bare Land to Lock-Up Stage: NZ Pre-Build Budget Breakdown
When we first bought our bare block of land, we knew there was a lot of work ahead of us. What I don't think you fully appreciate until you actually start, though, is just how much money gets spent before you have anything that remotely resembles a finished home.
Our overall plan for the property is quite a big one. We want to build our granny flat first, then eventually our main house, along with two sheds and everything else that comes with setting up the property.
Right now, we're still very much in the early stages. We've prepared the land, put in the driveway, started our first pole shed and got the poles in the ground. We're working towards getting that shed to lock-up stage, so I thought this was a good point to stop and look at exactly what we've spent so far.
This isn't our complete build budget. Far from it.
The total I'm sharing here is essentially what we've spent, or committed to spend, getting ourselves from bare land to the point where our first shed should be at lock-up stage.
It doesn't include the full cost of building the granny flat, our main house, our second shed, landscaping, polytunnels, orchards, fencing or the value of our own labour.
It also doesn't include our septic system. We're allowing around $15,000 for that separately.
So with that in mind, here's where the money has gone.
We started with the architect
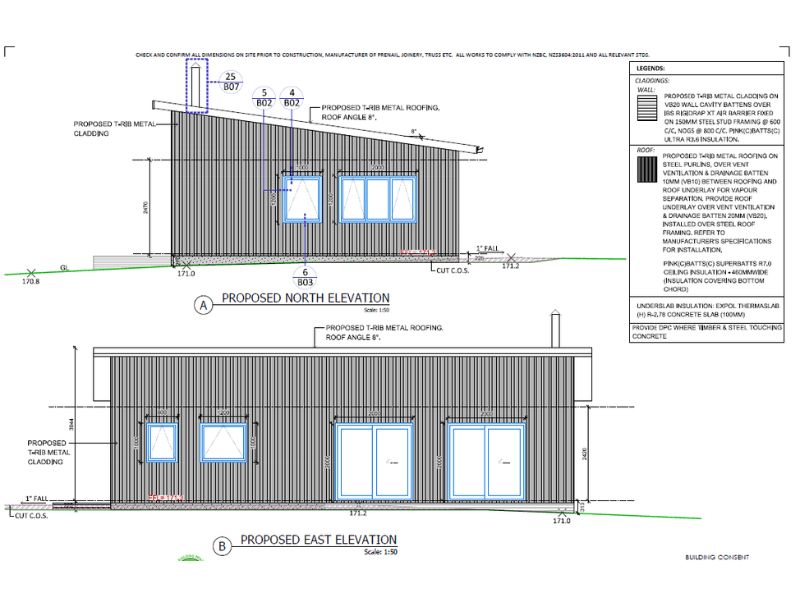
One of our first big expenses was our architect, which cost us $12,000.
That covered our concept plans and the consent documentation for our steel-framed granny flat.
Our granny flat will be around 80 square metres, and we're building it using a steel frame, so these weren't just some basic drawings to give us an idea of what the house might look like.
We needed proper plans because they formed the basis for everything that came afterwards.
This is one of those costs that you don't physically see on your property. You can spend thousands of dollars and still be standing in exactly the same paddock you started with.
But without the plans, we couldn't really move forward with the rest of it.
Then came the land survey
Our land survey cost us $2,645.
That took our running total to $14,645, and again, we still hadn't actually built anything.
For us, the survey was particularly important because we're not putting just one building on this property. We've got several structures planned, so we needed to know exactly what we were working with before we started positioning everything.
These early costs aren't particularly glamorous, but they're part of getting the foundations of the whole project right before you start spending much larger amounts of money.
Our pole shed kit was the first big physical purchase
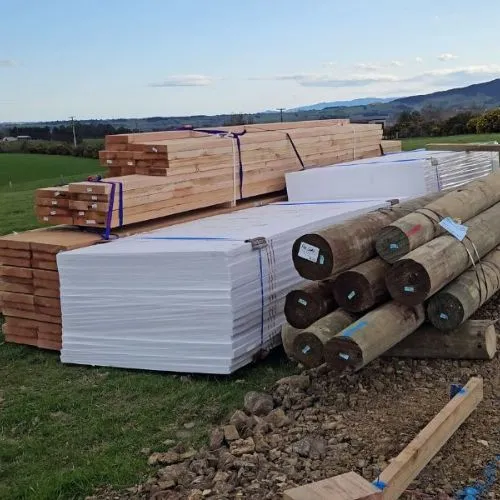
Next came our pole shed kit from PlaceMakers.
Our shed is 9 metres by 12 metres, so it's 108 square metres in total, and we paid around $27,000 for the kit.
That took our running total to $41,645.
This was probably the point where it started to feel like we were actually buying something tangible for all the money going out.
We're building the pole shed ourselves, and our plan is to temporarily live in it while we build the granny flat. Once we've finished the granny flat and moved into that, the shed goes back to being a shed.
That was quite important to us.
We could have spent money on some form of temporary accommodation that we'd have little use for afterwards, but we'd always planned to build a shed anyway. Every dollar we spend getting this building up is contributing towards the finished property.
The shed itself is only one part of getting it to lock-up stage, though. Once you start adding everything else required around it, the costs start climbing pretty quickly.
Driveway and shed pad
We spent around $9,500 getting our driveway and shed pad done.
Our driveway is roughly 35 metres long and about 3.5 metres wide, and we also needed the ground prepared and levelled for the shed.
That brought our running total to $51,145.
This is another area where I think it's easy to underestimate costs when you're looking at bare land.
You don't just turn up with your building materials and start putting up a house or shed.
You need access.
You need somewhere for delivery trucks to get in.
You need somewhere for materials to be unloaded.
You need machinery to be able to move around the property.
And obviously, you need a properly prepared and level site to actually build on.
None of that looks particularly impressive when it's finished, but it's money that needs to be spent before the main building work can really get underway.
Getting power to the site
Our builder's pole cost us $3,314.
That included a $146 PowerNet charge.
Once we added that, our running total was $54,459.
I've talked about the builder's pole separately because there's quite a process involved in getting power connected to bare land, but from a budget point of view, this was another cost we needed fairly early in the project.
We need electricity while we're building, and eventually that temporary setup will make way for the permanent power supply to the house.
Again, it's one of those things that's easy to forget when you're sitting down and thinking about how much a house or shed is going to cost.
The building itself is only part of the story.
Our windows were around $10,000
The windows for the shed cost us around $10,000.
This is one area where our CBS account made a huge difference.
Without our CBS discount, the windows would have been around $15,000 retail, so we saved roughly $5,000 on the windows alone.
I've talked about CBS in some of our other content because I think it's something worth looking into if you're planning a build yourself. You don't necessarily have to be a tradie to qualify for trade pricing, but you do need to meet their criteria.
For us, the savings have been substantial, particularly on things like the shed kit and windows.
Once we added the windows, our running total reached $64,459.
Then we needed the garage door
Our garage door was another $3,500.
We've gone with a sectional, automatic, insulated double garage door from Dominator Southland.
That brought us to $67,959.
This is where you start getting into the things that actually turn a shed frame into a secure building.
The kit gives us the basic structure, but we still need windows, doors, insulation, concrete and everything else required to close the building in.
Those individual costs add up very quickly.
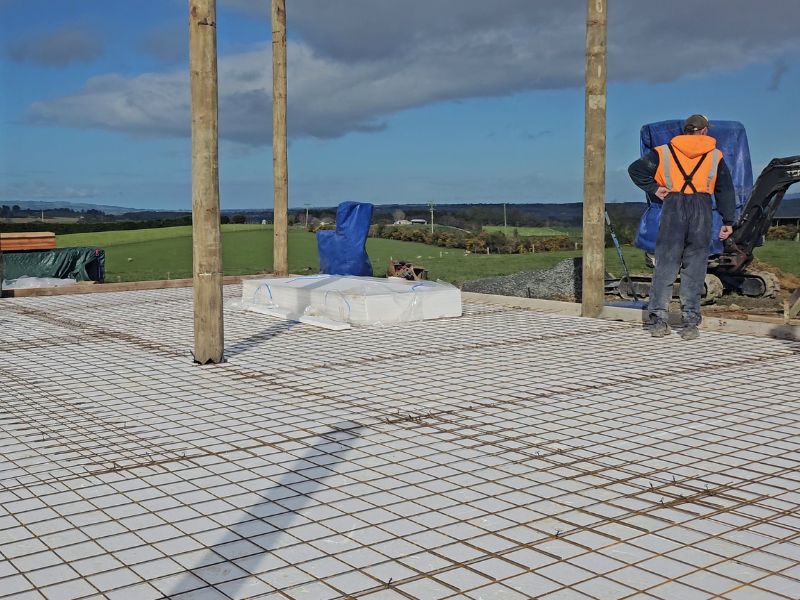
Floor insulation was another $1,800
For the shed floor, we bought Expol insulation, which cost us around $1,800.
Our shed is 108 square metres, and we've put approximately 50 mm of Expol underneath the concrete slab.
That brought our running total to $69,759.
Compared with some of the other numbers in this build, $1,800 doesn't sound too frightening, but it's another example of how many separate costs there are.
When you first look at the price of a shed kit, it's very easy to think that's roughly what your shed is going to cost.
It isn't.
The kit is just one part of it.
Engineering drawings for the granny flat
Our PS1 engineering drawings cost another $4,500.
We're using Steelhaus for the steel frame for our granny flat, and we needed the engineering work completed as part of getting everything ready for consent.
That brought our running total to $74,259.
This is another cost that isn't actually related to physically building the pole shed, but it's part of our overall pre-build spending because we're progressing the granny flat at the same time.
We don't necessarily have to build the granny flat immediately, but getting the consent sorted means we're ready to move ahead with it when we're ready.
Building consent
We've allowed $5,500 for the consent costs.
That takes our running total to $79,759.
When you start putting the architect, land survey, engineering and consent costs together, you can see how much money can be spent before the actual house starts going up.
These are all necessary parts of our project, but they're also exactly the sort of costs that can disappear from your thinking when you're initially trying to work out how much money you're going to need.
Then Trailer Swift arrived
Our caravan cost us $29,000.
We'd originally looked at another caravan for around $15,000, but that wasn't the one we ended up buying.
We eventually bought our Swift caravan, which we've since named Trailer Swift, for $29,000.
That took our running total to $108,759.
This obviously isn't part of the shed itself, but it's very much part of our cost of getting onto the land and building.
We need somewhere to stay while we're doing all of this.
Eventually we'll be able to temporarily live in the shed while we're building the granny flat, but until we reach that stage, the caravan gives us somewhere comfortable to stay on the property.
Temporary accommodation can very quickly become another substantial part of a self-build budget.
Trailer Swift needed somewhere to sit
Of course, buying the caravan wasn't quite the end of that story.
We also needed somewhere decent to put it.
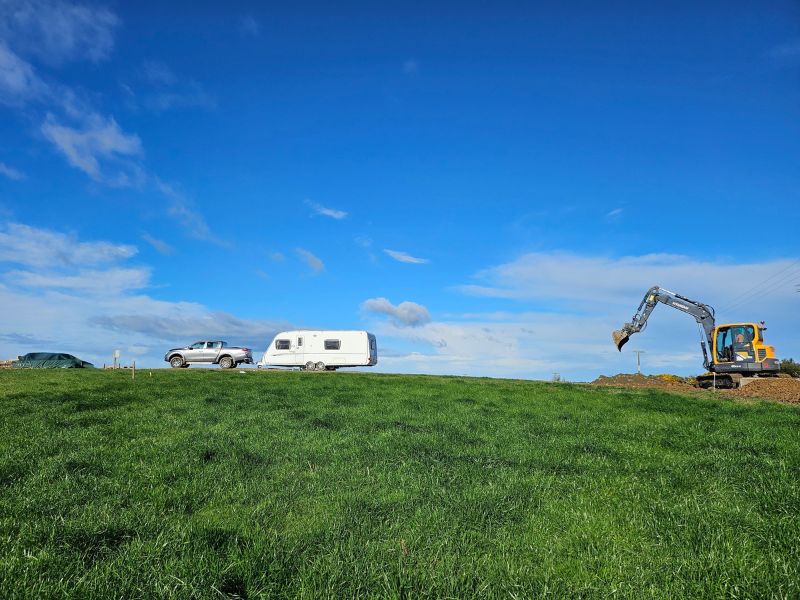
Our first attempt at parking it on the grass didn't go particularly well. The ground was muddy and uneven, and we quickly realised we needed proper hard standing.
So we had a pad made for Trailer Swift, which cost us around $2,000.
That took our total to $110,459.
It's another cost we hadn't necessarily thought much about at the beginning, but that's the reality of developing bare land. One job tends to create another job.
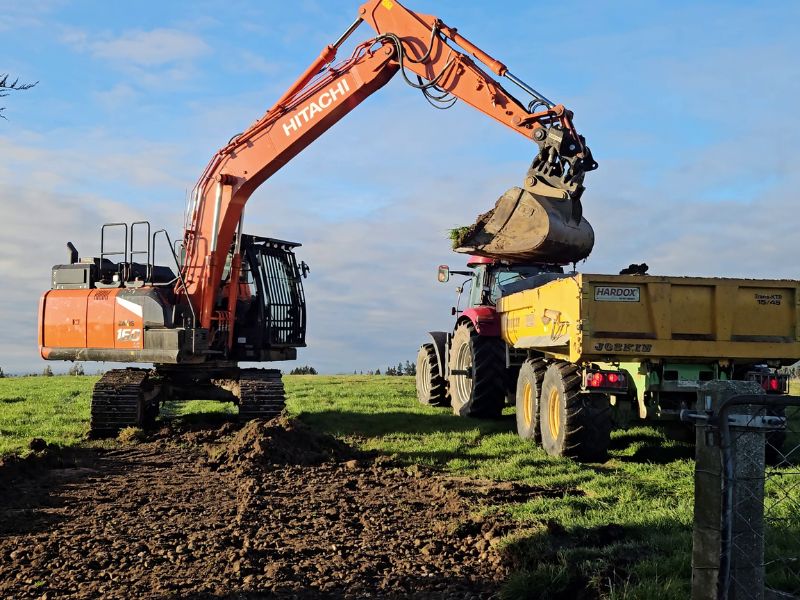
Digging the pole holes and adding more rock
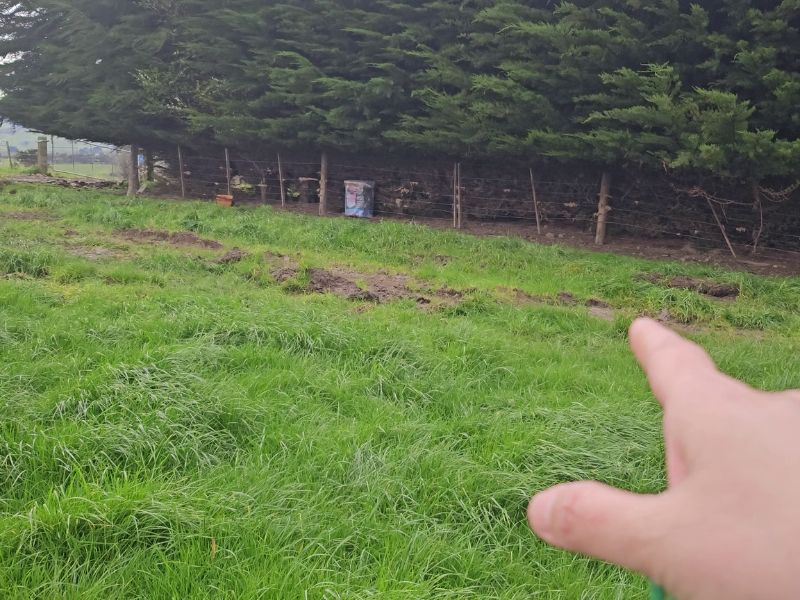
We then spent another $1,500 on getting the holes dug for the pole shed, along with extra rock, cartage and gravel.
That brought our running total to $111,959.
Again, this isn't the exciting part of building.
It's machinery, digging, moving material around and preparing the ground so the structure can actually go up.
But these are real costs, and if you're trying to budget for a project like ours, they're exactly the costs you need to allow for.
Our 40-foot shipping container
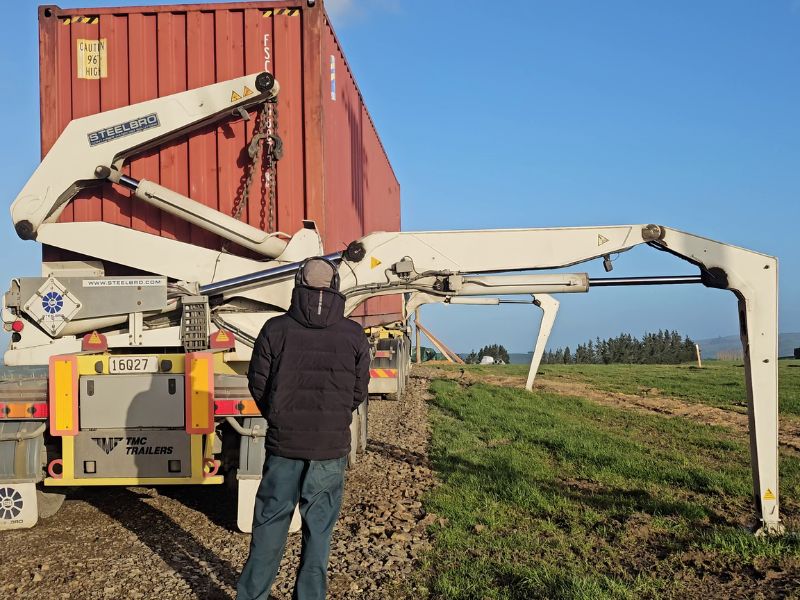
We also bought a 40-foot shipping container.
We paid $8,018 including delivery to our site, with the delivery component itself costing $180.
We've also allowed another couple of hundred dollars to get the container moved into its final position, so realistically we could end up at around $8,218 all up.
Using the $8,018 figure, our running total reached $119,977.
The container gives us secure storage for all the materials we're accumulating as the build progresses.
Once you've got a full pole shed kit, windows, insulation and everything else arriving on site, you need somewhere to keep things protected.
We learned that fairly quickly when the weather turned and some of our timber ended up absolutely soaked.
Storage on a building site isn't particularly interesting until you desperately need it.
Then suddenly it becomes very interesting.
Our concrete slab
The concrete shed pad is currently estimated at around $14,500.
Once I add that to everything else, our running total comes to approximately $134,477.
And that's basically where we are for getting ourselves from bare land to the point where our shed should be at lock-up stage.
It's worth making the distinction because $134,477 isn't the cost of our shed.
There are costs in here that belong to the wider project, including the architect, engineering, consent, caravan and container.
But these are the actual costs we've had to deal with to get ourselves to this stage of developing the property.
So where has the money actually gone?
When I look at all these figures together, one of the biggest things that stands out is how much money gets spent before you've built anything particularly impressive.
We've spent money on architectural plans, surveying, engineering and consent.
We've spent money getting access onto the property and preparing the site.
We've paid for temporary power.
We've bought a caravan so we can stay there.
We've bought a shipping container so we've got secure storage.
Then there are the actual shed costs, including the kit, windows, garage door, insulation, excavation and concrete.
It's not one huge expense.
It's lots and lots of separate expenses that gradually build into a fairly substantial number.
And that's exactly why I've been tracking these costs as we go.
This is a stage budget, not our finished build budget
The $134,477 figure is really a snapshot of where we are right now.
It's not the total cost of developing the property.
We still have the granny flat to build, our main house, another shed, septic, water tanks, landscaping, fencing, gardens, polytunnels, orchards and plenty more.
We're also doing a lot of the work ourselves, so this isn't necessarily comparable to what it would cost if we handed the entire project over to a building company.
But I think sharing the actual numbers is much more useful than talking about broad averages.
If you're planning to buy bare land and build in New Zealand, the cost of the house or shed itself is only one part of what you need to think about.
There are a lot of costs that come before it.
For us, getting from an empty paddock to this stage has meant spending money on everything from drawings and surveys to gravel, power, storage and somewhere to sleep.
Some of those expenses will benefit the entire property for years to come. Others are specifically related to this first stage.
And some, like Trailer Swift, weren't necessarily part of the original picture at all.
That's the reality of our build so far.
We have a plan, but we're also adjusting that plan as we go, working out what we need next and trying to make sure the money we're spending contributes to the property we're eventually trying to create.
If you'd like to keep following our progress as we turn our bare block of land into our home, The Homestead Letters is our monthly snail mail subscription. We share more of our homestead and building journey through a physical letter delivered to your mailbox, along with the bits and pieces of everyday life that happen along the way.